A binocular is actually a pair of refractor telescopes joined together. The alignment between these two telescopes is called “collimation”. Proper collimation is critical to a binocular’s performance, and the user’s viewing enjoyment. The brain can do a remarkable job of compensating for poor collimation, but has more trouble doing so on the night sky due to the much lower amount of visual information. For this reason, good collimation is especially critical for astronomical binoculars. Every Oberwerk binocular is thoroughly examined, tested, and collimated before shipping to our customers. But because collimation is occasionally lost due to rough handling during shipping, or from accidents (dropping the binocular), we are providing instructions for collimation here.
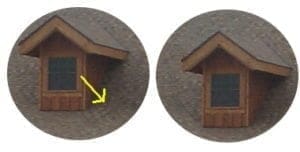
Surprisingly, collimation adjustment is easiest to perform in daylight. Collimation can be quickly be checked by viewing an obect with distinct horizontal and vertical lines, such as a house, building, or fence, at least 100 yards away. It is best to do this outdoors, as viewing through a window can cause distortion from diffraction. Begin by focusing on the object. Alternate viewing with the left and right eyes by gently closing one eye at a time. Alternate eyes about once per second. Relax your eyes as you do this so they are not compensating for misalignment. Notice that the object will move somewhat as you alternate eyes, the same as if you were doing the blink test without looking through a binocular. A slight amount of horizontal movement (to the left with the left eye, and to the right with the right eye), is normal (same as doing the blink test on the target without the binocular). Excessive horizontal movement, or any amount of vertical movement (see pic at right), should be corrected.
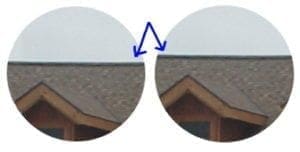
To check vertical collimation, look at a distinct horizontal line, such as a roof line, gutter, or fence rail. Slowly move your eyes back from the binocular until they are about 3 inches away, while maintaining the view of the horizontal line in eyepieces. Let your eyes relax and focus more on the image at the eyepieces rather than through the binocular. Even a slight vertical miscollimation will now be readily shown as a difference in position of the horizonal line (see pic at right).
Now that we can determine collimation problems, how do we correct it? The secret is the porro prism adjustment setscrews hidden under the rubber armor close to the edge of the prism covers, as shown in the picture at the lower right. Use the screwdriver to carefully lift the rubber covering to reveal the setscrews. If you don’t stretch the rubber any more than necessary to reveal the setscrews, the rubber will snap back to original position when you are done. The setscrews may be rather difficult to move, and some downward pressure may be necessary to prevent stripping of the setscrew slot.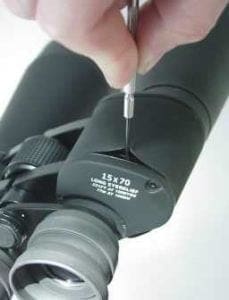
The setscrews move the image in the same direction as the screw. So when screwing the right setscrew inward (clockwise as viewed from above), the right image will move downward and also to the left. Unscrewing the right setscrew (couter-clockwise) moves the image upward and also to the right.
The left setscrew works in the same manner for the left image. Turning the setscrew clockwise moves the image in the left side down and to the right, counter-clockwise moves it up and to the left.
Typical minor miscollimation can usually be corrected by tightening just one setscrew. The key is to determine which side needs to move, and how much it needs to move. Make adjustments in very small increments, moving the setscrew as little as possible, and frequently checking progress by using the above visual tests. To correct for horizontal miscollimation, where excessive left-right difference exists between the left and right views, requires moving both setscrews. Move them both inward to push the images downward and toward each other. Make sure that you end up with perfect vertical alignment. A slight amount of left right movement between the two images is acceptable- in other words, the left image should be slightly to the left, and the right image, slightly to the right. Under no circumstances should the images cross over to the opposite direction- this will quickly cause a headache if viewing for any length of time.
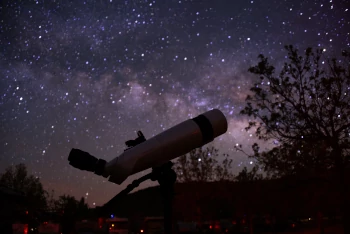
Using the above techniques should allow you to obtain perfect collimation. The ultimate test is to view the night sky. Bright objects such as Jupiter should be well merged, with no double images. Perfect collimation will allow you to view for extended periods with no eyestrain or headaches.
Shipping Protection gives you peace of mind while saving you time and money.
Coverage in case your package is damaged in transit, stolen, or doesn't arrive.
Get a refund or replacement in just a few clicks.
Route is here for you whenever an issue arises — with an average response time of under an hour.
Don't have an account? Click here to register.